Continuing to electro-etch copper, brass and silver.
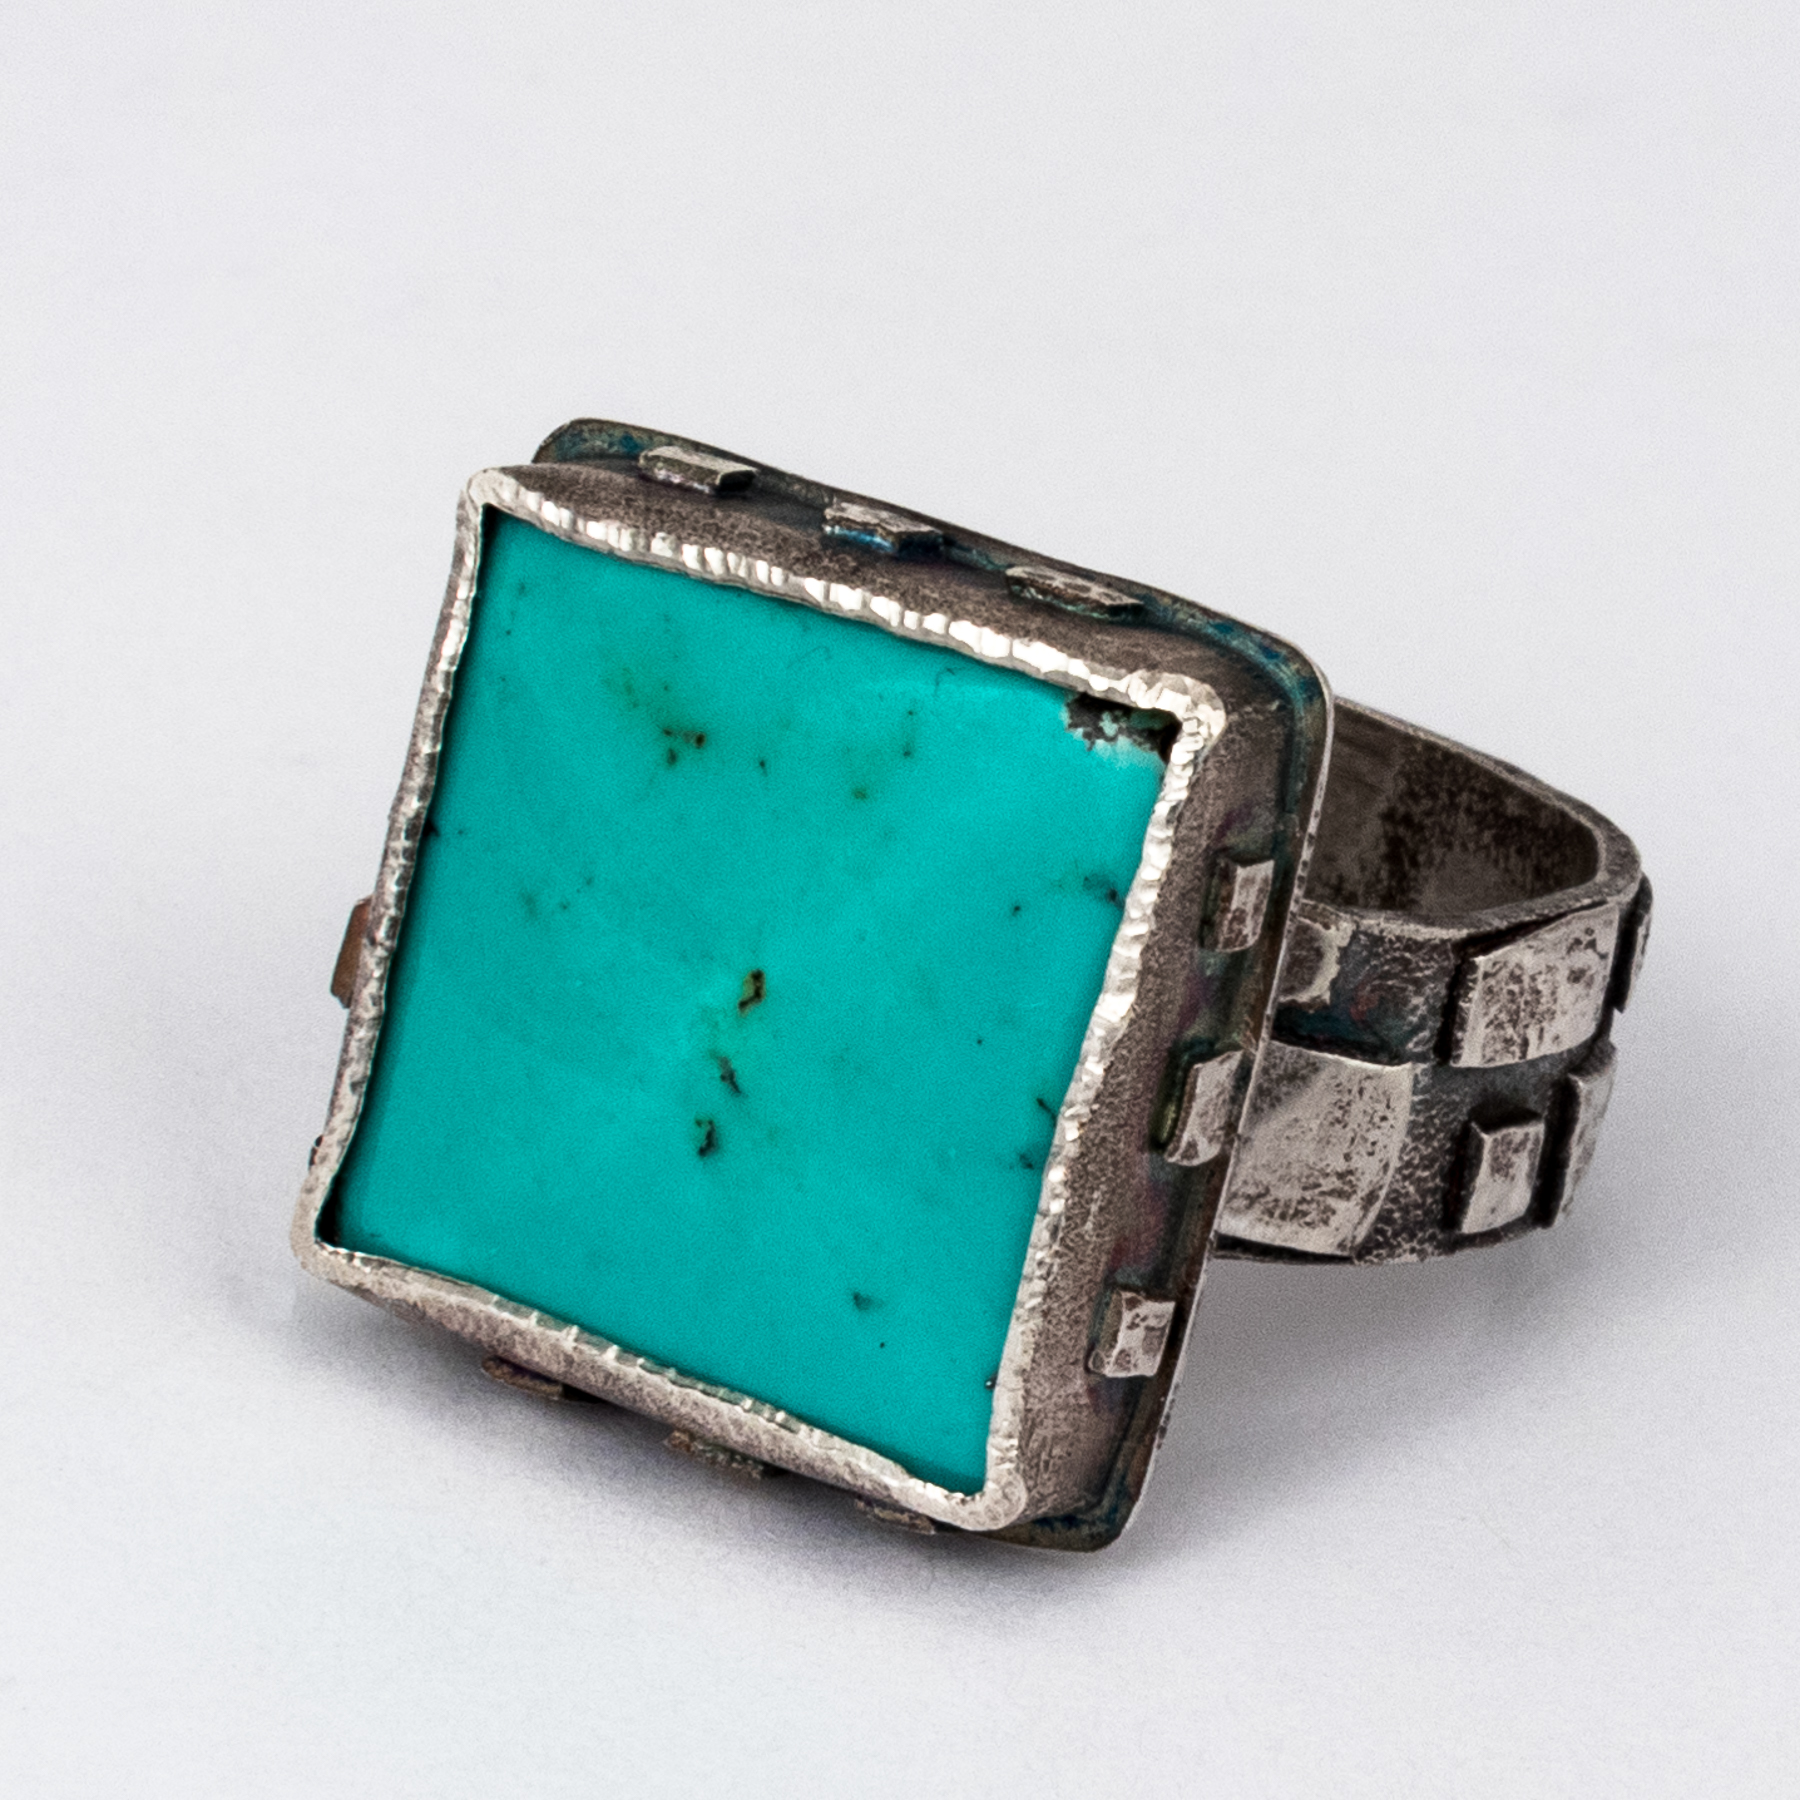
Played with granulation and fusing techniques (no solder) for developing strong pattern and textures. I fused fine silver to sterling silver for the bands, fine silver to fine silver for the bezels, and added a little 24K for the touch of gold. I found the thin plate of silver with “friendship” stamped on it when searching for a little lift for the stone in the setting… especially meaningful as the marble beach pebble from Greece was given to me by my good friend Jan.
More recently I have returned to enameling to add color to the etched copper.
Six months of etching adventures to catch up on. There are lots of etched plates with notes and photos to share, several new tools to show and tell, a few metal working techniques used to make the finished jewelry, plus photos of some of my favorite finished pieces made using the process. The fun of making and learning continues. Sharing the learning is next.
Here is a start. These five photos illustrate just a few of the many steps I take in the creation of a new design. It starts with the inspiration and results in a unique piece of jewelry.
fossil coral stone
photo transformed for resist
Using a template
Forming band with punch
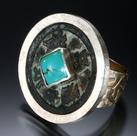
Etched Silver Ring
Check back later to see more of the steps if you are curious and to learn about what is new with my techniques for electro-etching both copper alloys and silver. I continue to learn from others who practice the techniques and share their knowledge freely on the Facebook Electro-Etchers Anonymous Group page. It is interesting to read about the various methods used to arrive at the desired end. No single one way best for all. My purpose in sharing is to say what is working for me at this time. Anyone looking back at my earliest etching posts will see how much my methods have changed over the years as I continue to improve results. I welcome comments and questions.
New toys (tools), new techniques, lots of learning and a little finished work.
cupric nitrate ready to etch
I am now electro-etching silver with cupric nitrate and using a new power source to control the amps. This cigar band ring features a deeply etched design that appears carved. The pattern started with an image of William Morris wallpaper found in a Dover book.
Many thanks to John Fetvedt for the clear and complete instructions he provides in his excellent Electro-Etching Workshop Handbook. The 43 page PDF is freely shared and available on his website. Go to “For Our Students” page. I have also learned quite a bit by participating in a Facebook Group created specifically for all things related to Electro-Etching. Search for Electro-Etchers Anonymous if you are curious. This is a “closed” group that you need to join to see. A very welcoming and interesting group.
While I am not new to electro-etching… see my earlier salt water etching posts… the use of cupric nitrate for etching silver is a first for me. I also continue to etch copper and brass with salt (sodium chloride) that I now add a bit of citric acid to.
As of a couple of days ago, I have a newly designed website. Same site address… www.carolholaday.com …. with a totally new look. This is thanks mostly to the fact that I had major issues with the DreamWeaver software I used to create and work on my “old” site and NO help from Adobe for fixing it, so I gave up and started over with a Website Builder from GoDaddy.com. Much easier to use for the purpose than DreamWeaver, and with great customer support when needed. Not sure yet how much I’ll include on this new version of my old site, just know that it will be scaled down and simplified quite a lot.
To begin with, the purpose of the site is to show my work in something like a personal on-line gallery. Some of what is shown will be for sale, so eventually I’ll need to work out an easy way to do that without actually having a “shopping site”.
I’d love to hear your feedback and suggestions if you care to have a look at the “new” site and leave your comments on the “contact” page.
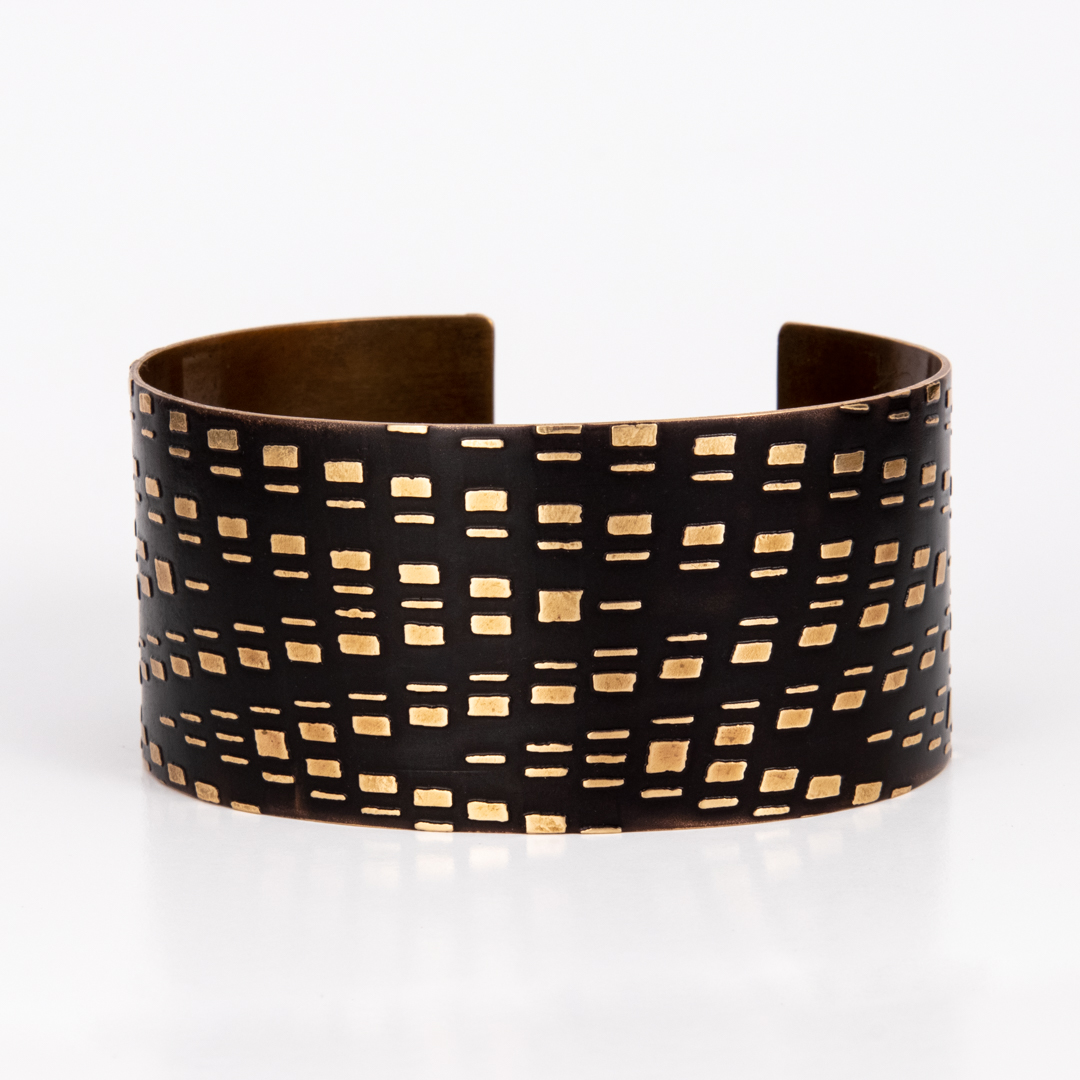
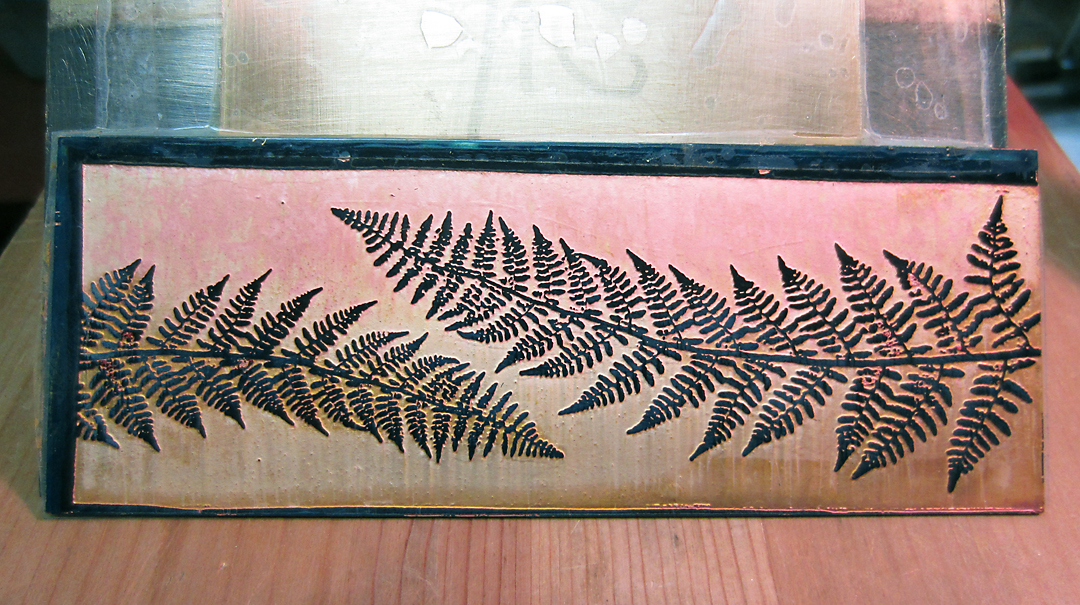
The cuff bracelet below was made from the texture plate I originally created for roll printing my fern photo onto silver for various jewelry designs. I used it a few times and then decided to make a cuff of the etched plate itself. This brass cuff is strong and comfortable and is now available for purchase using PayPal.
I use Press-n’-Peel/lazer printer ink image transfer process as a resist for etching my printing plates. I use the Staedtler pens for touch-up purposes when the design doesn’t transfer perfectly. They can also be used for drawing directly on the metal. This ink will hold up longer than Sharpie ink will. I bought a box of ten from Amazon.com at a good price. Update: 2018 I recently switched to salt water etching with citric acid added to the solution and discovered this resist did NOT hold up as well as in the salt solution without the citric acid.
I photographed the recently created “Bird” cuff on a white background and on a black glass background as a test to see what works best for the piece. Both seem OK to my eye… just very different. The black is dramatic, the white seems more contemporary. If I were to list this in my Etsy shop, I might also photograph it with some props from the garden. A leafy branch or two for instance. Plus I need a photo that shows the out-side of the ends as an alternate view.
The brass sheet was originally photo etched to use as a plate for roll printing onto silver, however, I decided it would work better used directly for jewelry. I am now wearing the cuff to see how the polished surface might change over time. The dark background is a heat patina that developed naturally when I annealed the metal for forming.
Documenting a process. I am slowly working on describing the steps I use in creating original artwork for the photo-etching technique I use to produce pattern on sheet metal.
color photo of fern
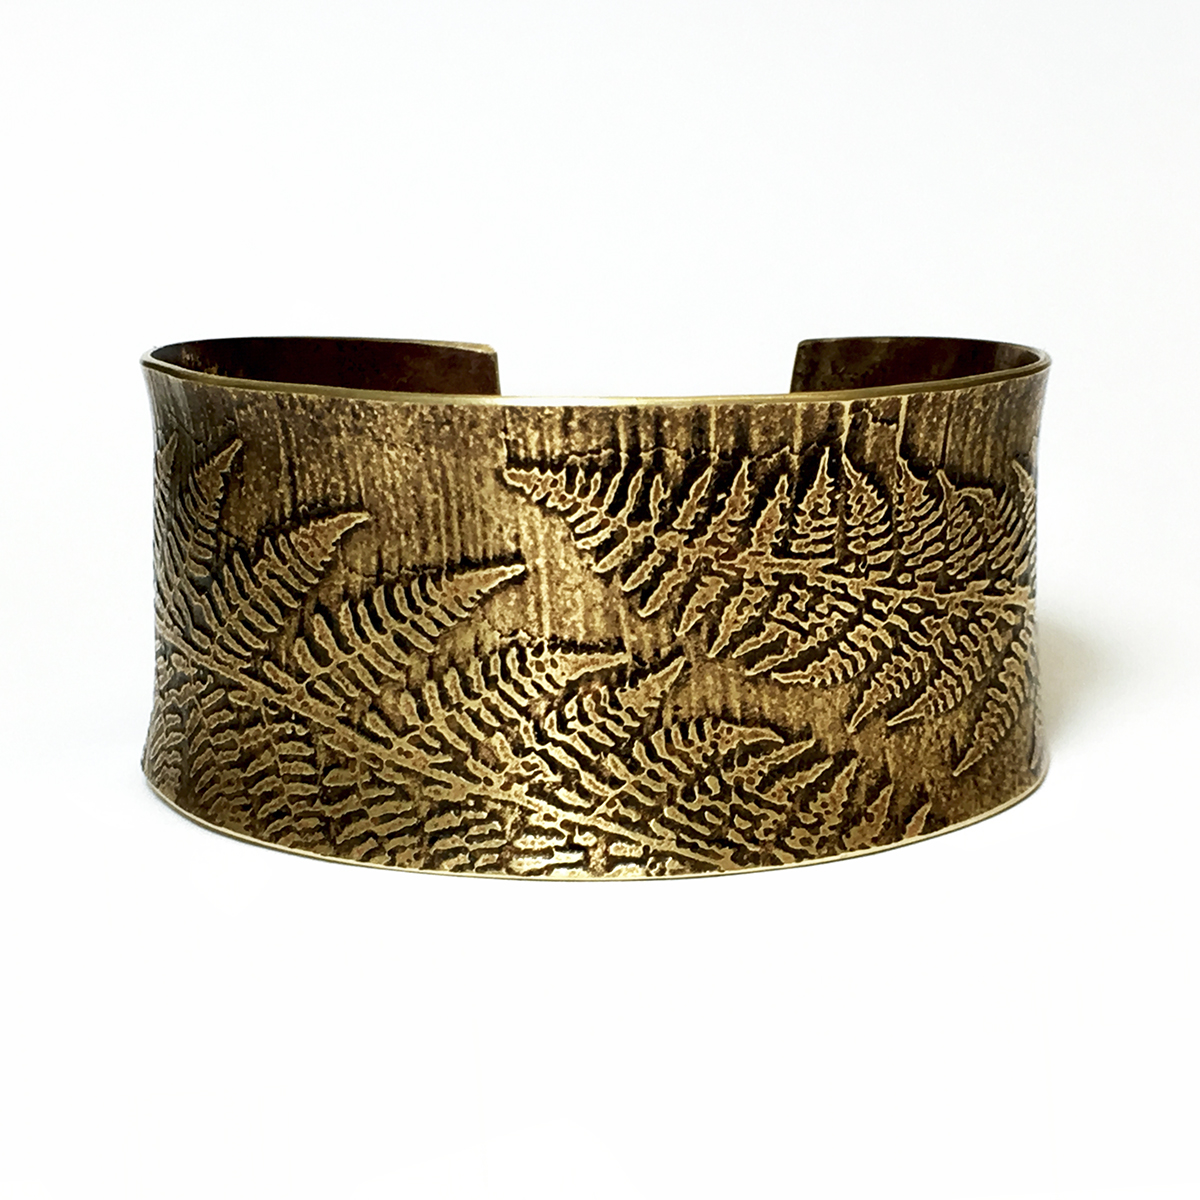
I find that starting with my own photos gives me a way to create unique patterns that express my interests. These patterns can be applied in many different ways… ending with a great variety of “results” depending on the choices made along the way. Just three of the many possible results are featured in this post as examples. Only three cuffs for now, but I also have ring bands and pendants from the same photo.
Cuff bracelet with fern printCuff above was first colored with heat and then a chemical patina was applied.
Fern Cuff with LOS only Cuff above has a simple LOS patina only.
Fern Cuff with Guilder’s paste and LOS Cuff above was first colored with both gold and silver Gilder’s paste, and then with LOS.
Edit May 5, 2013 – I keep starting and stopping with this “tutorial” project because I am not sure I have anything new, or sufficiently different, to add to what is already available on the subject. Just do a Google search for “how to etch metal at home” and you will be overwhelmed by the results. Or an image search for “etched copper jewelry” and many of the results will take you to instructions. This is a VERY popular technique with lots of variations for every part of the process… start to finish. Plus, how useful would instructions for preparing an image from a photo be for someone who doesn’t have Photoshop for transforming the photos? Will Photoshop Elements work? How about the free photo editing programs? One large tutorial or many smaller ones for each step? Lots to think about. Meanwhile, I think I’ll simply report on what is working for me as a way of sharing.
The small power source (see Feb. 14 post for photo) works perfectly well for the larger etching set-up I made for cuff sized blanks and roll printing plates. I would still like to have a power source that would allow for setting the voltage to 1.5V. The little black one only goes down to 3V at a preset 2amp.
larger etching tank set-upanother view of larger etch tank
I used an acrylic display case designed for model cars for this tank that accommodates a 3″ wide X 6″ long (or smaller) piece. The tank is 4 1/2″w x 9″l x 5″h. The closer the anode is to the cathode, the faster the etch. The “wings” on the cathode and anode supports help to keep the plates parallel in the tank as well as providing a place for attaching the leads that is away from the water.
A deep etch on 18g brass took 3 hours. I used a soft brush to clean off both the anode and the cathode several times during the process. I plan to use this plate for roll printing a few copper cuff blanks, and then perhaps use it to make a cuff… or maybe will cut it up for several pendants. deeply etched brass plate with fern design
The black on the plate shown above is the lazer toner resist. I removed this with Citrasolv before using the plate for roll printing silver for a ring band. etched fern plate with printed silver
I used the etched brass plate to roller print an 18g sterling strip to use for a ring band.
IMPORTANT UPDATE: Since posting the information below regarding the use of kosher salt for etching metal, I have continued to research the technique and now know that I was right to question the safety issues involved. I stopped using the salt and will be switching to using copper nitrate instead. Anyone interested can read about this in the excellent, well illustrated 13 page PDF created by Ben Dory.
Once I have it all up and working again, I’ll post my results.
Anyone interested in etching metal in their own studios should read this excellent book first. Coral Schaffer covers a great variety of techniques, including (but not limited to) electro-etching. In particular, I value the safety information provided for the various methods included in the book.
Relief Etching for Jewelers and Enamelists
In reading many blogs and posts related to electro-etching with salt water and some power source (including batteries), I see that most think of the salt water methods as “safer” than methods using ferric chloride. This is a misconception in my opinion. While salt water may be less messy, cheaper, and easy to make, it is only as “safe” as the methods used. It still results in copper dissolved in a solution that is bad for the environment, not safe for contact with skin, eyes, etc.. The copper rich salt water must be disposed of at a hazardous waste drop-off location.
If you etch with salt water, follow all safety instructions carefully. Gloves, eye protection, good ventilation, and proper disposal of copper rich water.
February 18 Update:
With the goal of making an easier, faster, and better connection of the piece to the lead, I cut a sheet of copper to tape the piece to. This eliminated the need for holes drilled in the piece and the time it takes to attach and form the wires that connect the piece to the tube used to hold it for suspending in the tank. This worked as planned and made it very quick and easy to remove one piece and tape on another with no waste of copper wire. Much less messy as well.
Photo below shows the tank with the current switched on. I’ve etched a couple of pieces in this bath and the crud is really building up. Note how much is floating on the surface! Seems to work well all the same. Update: February 21 Just learned that this “crud” is “sodium hydroxide (lye) and copper chloride”. After the etch bath sits overnight, this crud settles to the bottom of the tank. I syphon off the clear solution to re-use (with added salt) and pour the crud into a bottle to take to the hazardous waste site. I am very careful to wear proper gloves to protect my skin at all times. Also safety goggles…. just in case.
new anode set-up
Photo below shows the piece taped to the latest version of the anode support. All areas not to be etched are covered in clear packing tape EXCEPT the piece that hangs outside the tank where the lead is clamped. The oxides/patina visible on the back of the piece is from a previous set-up where I taped wires to the piece and the salt water leaked in next to the wire.
piece taped to anode – back view
February 14th:
Win some, lose some.The continuing saga of the electro-etching experiments. This time using Kosher salt and distilled water.
In my enthusiasm, I purchased two power sources. The fancy one with the digital read-outs, dials for controlling both amps and volts, lots of available power. The price from Amazon.com was very good ….$60 plus shipping…. and if it had worked, I would be very happy with it. Unfortunately, it was defective and I returned it for a refund. At first I thought it was operator-ignorance causing the failure, so I had Sky bring in an amp/voltage meter to check it. the failed one
The less fancy, less powerful, and less expensive (about $33) one works very well. At least on the size of piece I etched with it yesterday. It remains to be seen how it might work on a larger piece in a larger container. It works at a steady, pre-set 2 amps. I set the adjustable voltage to its lowest option of 3 volts.
This one works: The one that works
Note: neither power source came with the required leads. I had to buy these from another seller on Amazon.
had to buy from a different supplier
I modified the anode following Sky’s suggestion that more edges would result in a faster etch. I also made certain that the connection of the copper wires to the piece were very good.
modified anode according to Sky’s suggestion
I used the smallest container I could find that would hold the piece (anode) and the cathode. The photo shows how the water looks the day after it was used for etching. Dissolved copper sinks to the bottom, a little junk floats. When the etching is happening, the water is very murky after a short while.
very small container for the salt water etching set-up
With all of these “improvements”, I was able to etch the 18g copper to the desired depth in a reasonable amount of time…. two hours. Next, I’ll try to etch larger pieces in a larger tank to see how this small power source handles the job.